Renovation Process & Quality Control
A clear, checkpoint-led way to run a Calgary kitchen or bathroom renovation, with quality control built into every stage instead of saved for the end.
The difference between a renovation that holds up and one that doesn’t is usually the process
When homeowners describe a renovation that went sideways, they rarely point to one big disaster. They point to the small things: a tile line that drifts off square, a cabinet door that sits a hair proud of its neighbour, grout that was rushed, a final walkthrough that felt like a formality. None of those are accidents. They are what happens when a job has no checkpoints, when finish work is the first thing squeezed when the schedule gets tight, and when nobody is responsible for catching mistakes before the work is called done.
We built our process around a single idea: the details should get noticed before you have to notice them. That means quality control is not a final inspection bolted onto the end of the job. It is a series of checkpoints woven through the whole renovation, from the first scope review through demolition, rough-in, finishing, and the punch list. Each stage has things that must be right before the next stage starts, because in a kitchen or bathroom the order of operations is unforgiving. A waterproofing shortcut hides behind tile. A layout error gets locked in the moment cabinets are set. Catching it early is the only way to catch it cheaply.
This page walks through exactly how a renovation runs with us, what we check at each stage, and how the final handoff works. It is meant for the homeowner who is comparing contractors and wants to understand what a professional, detail-controlled process actually looks like before signing anything.
- Quality control is built into every stage, not saved for the end
- Each stage has checkpoints that must pass before the next begins
- The same people who plan the work are the ones checking the finish
- You see progress and decisions in writing, not just verbally on site
Scope review and planning: getting the decisions right before any demolition
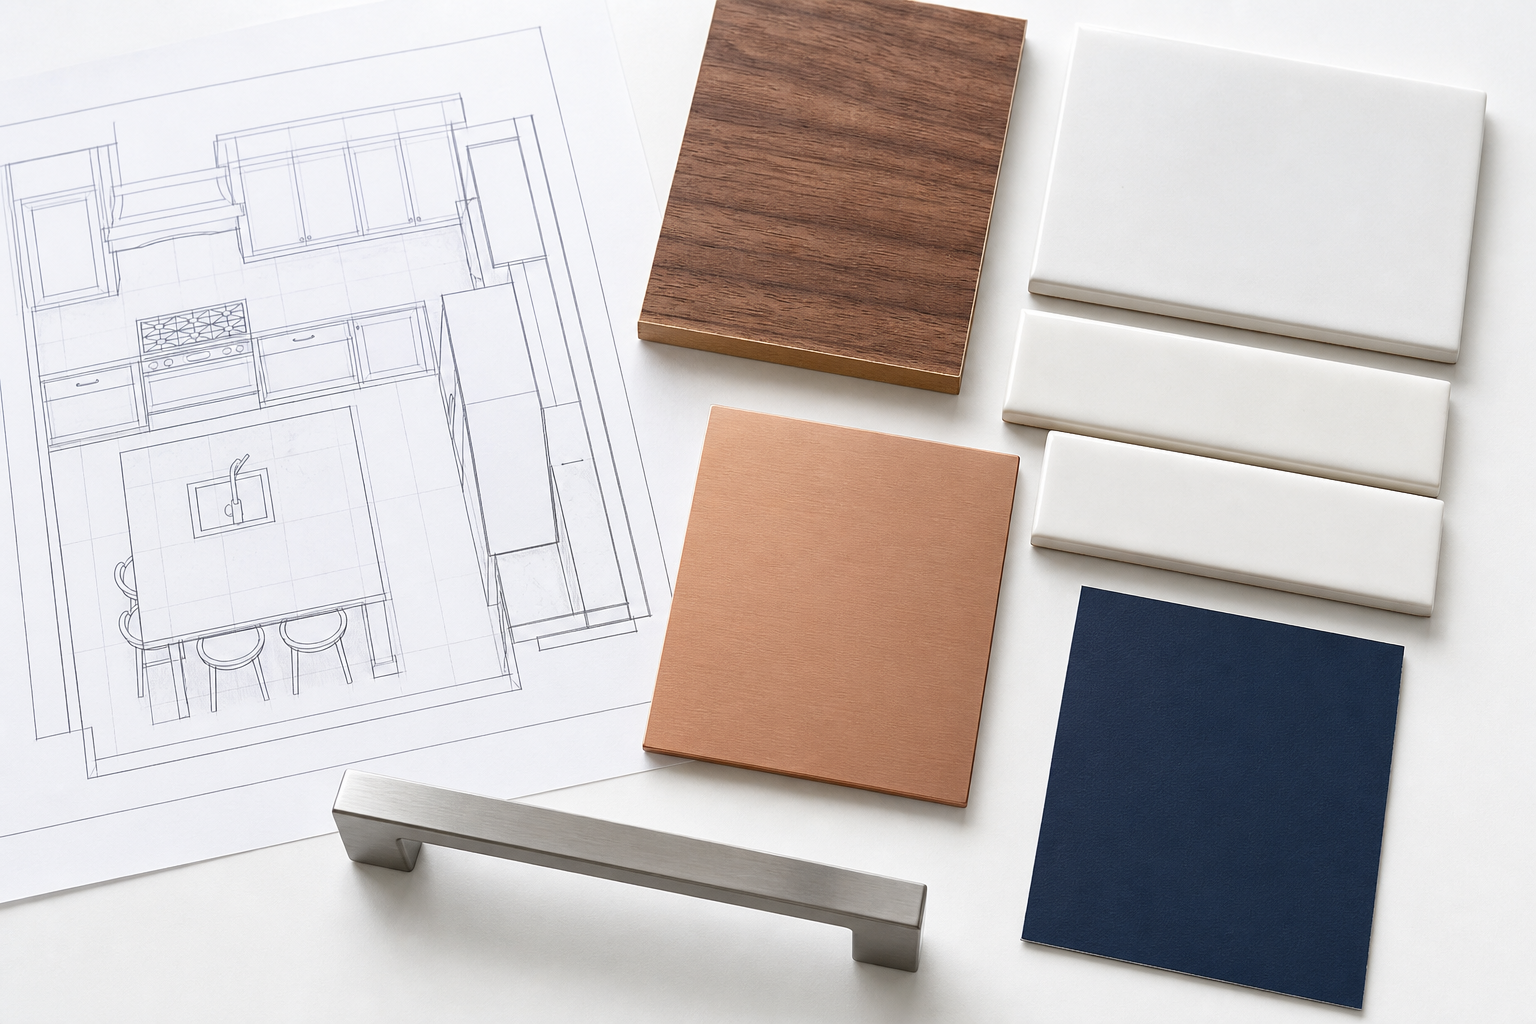
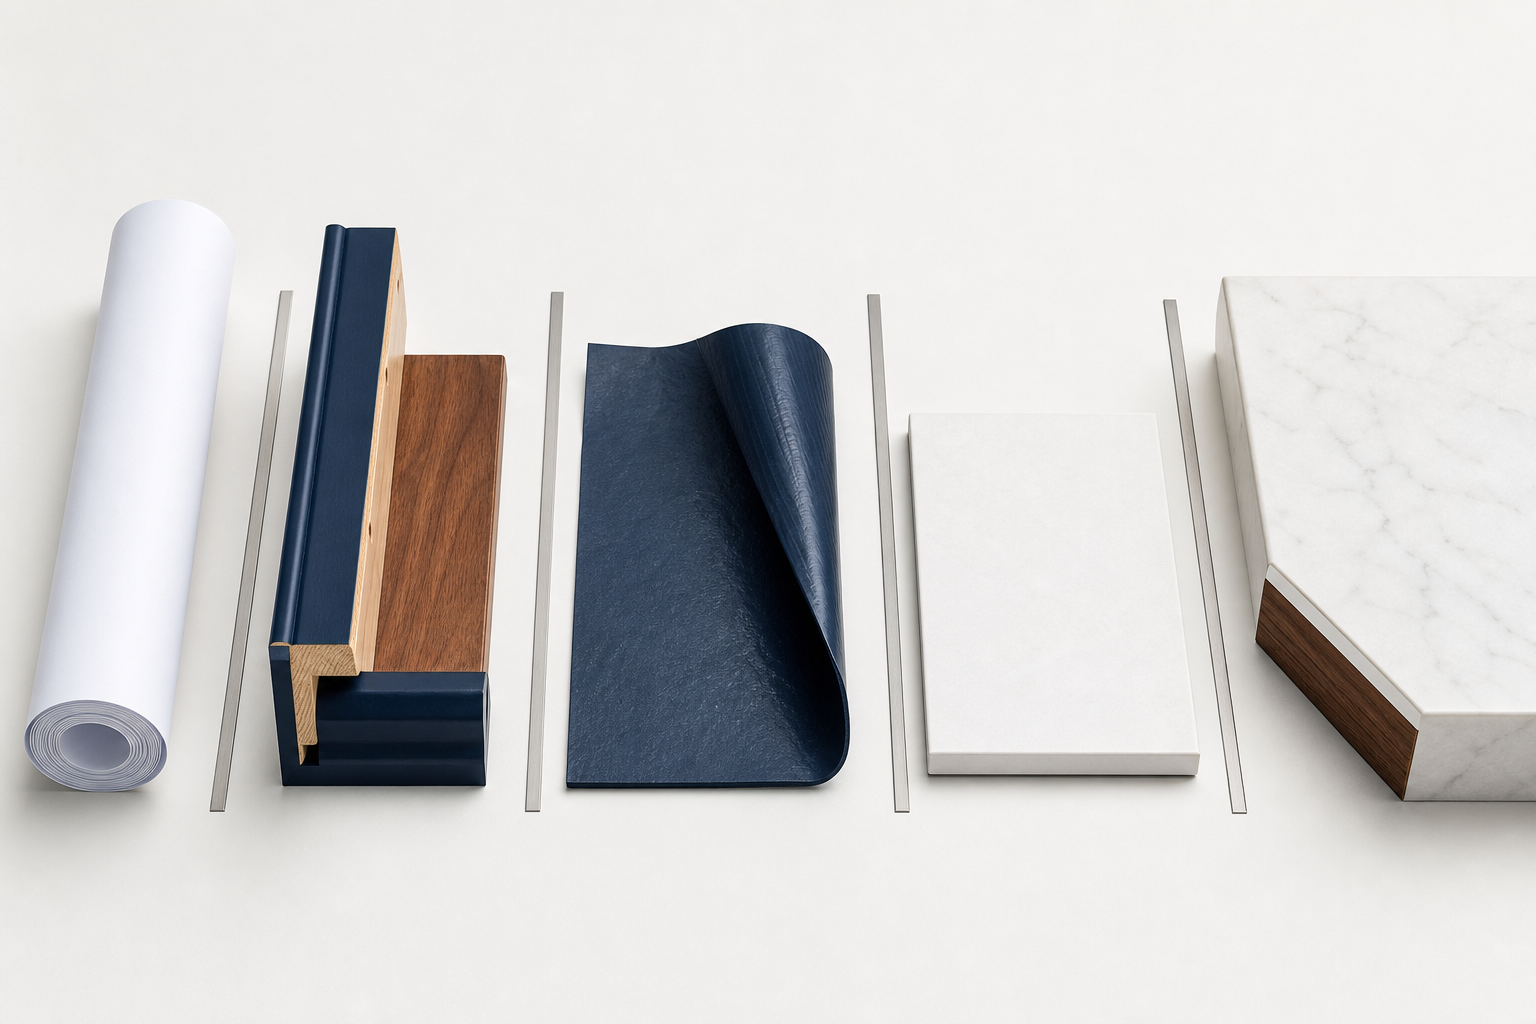
The most expensive mistakes are made before a single tool comes out, so the first stage is the most deliberate. We start with a scope review: we walk the kitchen or bathroom with you, talk through how you actually use the space, and document what the renovation needs to accomplish. This is where layout, cabinetry, tile, fixtures, lighting, and finish choices get worked out together, rather than decided one panicked email at a time once the job is already open.
Planning is also where coordination problems surface while they are still cheap to solve. A new island that crowds a walkway, a vanity that fights the door swing, a tile choice that needs a different substrate, a lighting plan that ignores where you actually stand to chop vegetables. These are the conflicts that turn into change orders and rework if nobody maps them up front. We work them out on paper and in conversation so the plan you approve is the plan that gets built.
Out of this stage you get a clear, written scope: what is included, the materials and finishes selected, and the sequence of work. Final pricing is confirmed by written quote, so there is no guesswork about what was agreed. When demolition starts, everyone is working from the same picture.
- On-site walkthrough and a documented scope of work
- Layout, cabinetry, tile, fixtures, lighting and finishes planned together
- Coordination conflicts caught on paper, not mid-build
- Selections confirmed so material lead times don’t stall the job
Demolition and rough-in: the stage where shortcuts hide forever
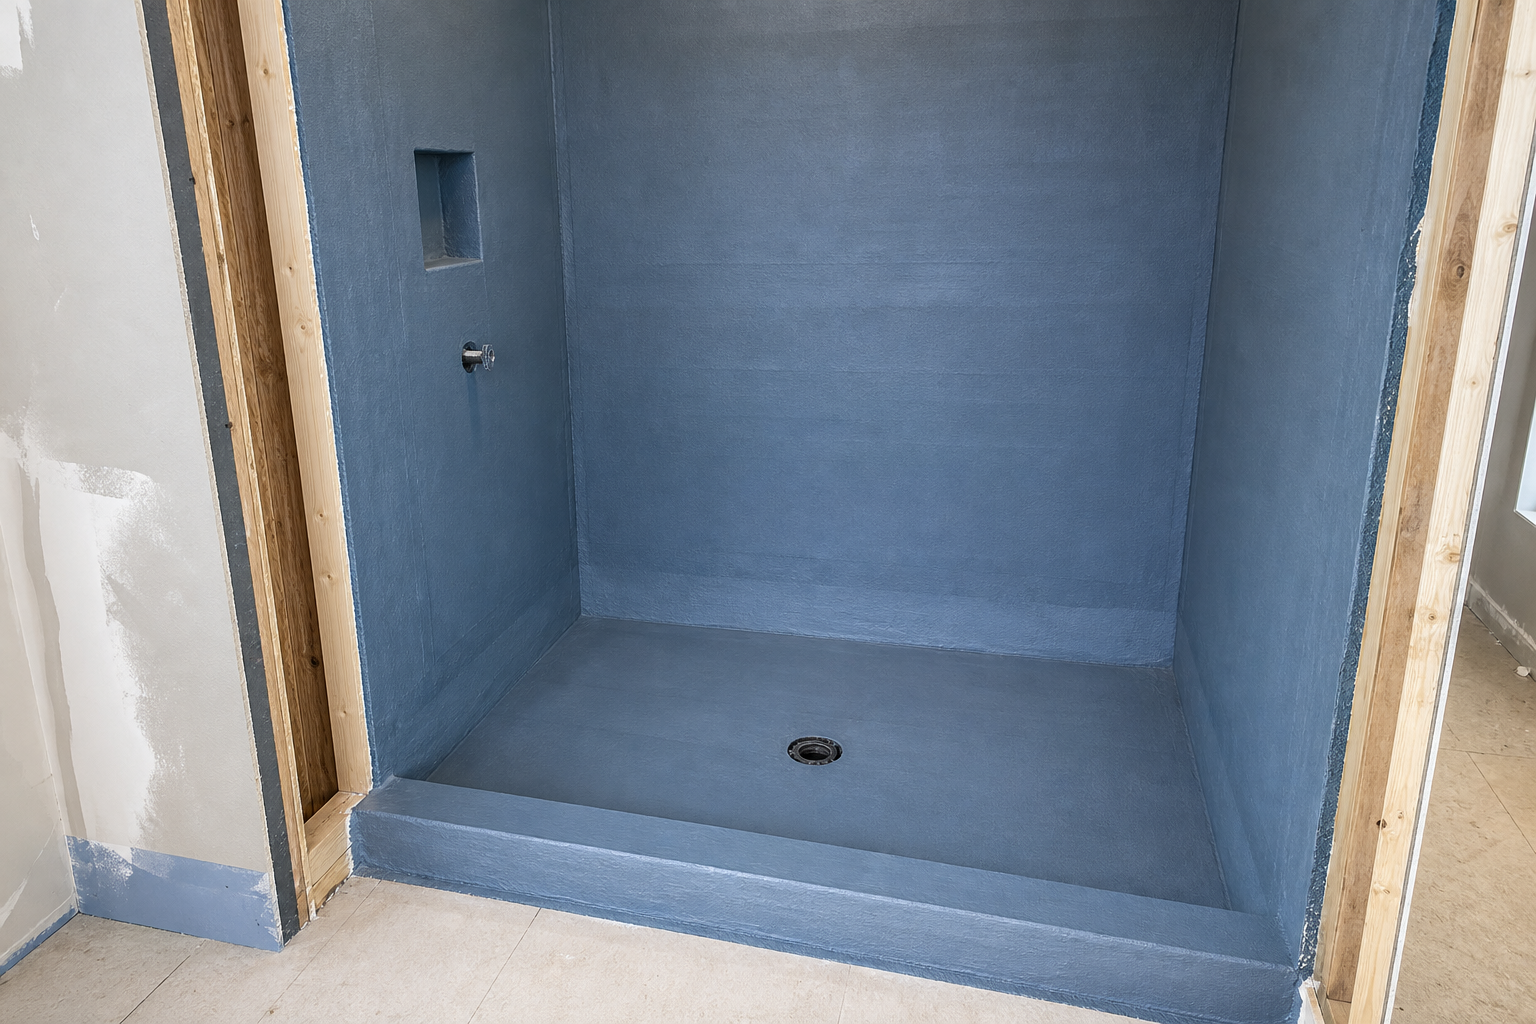
Once demolition opens up the walls and floor, the renovation moves into the part that nobody sees in the finished room but everyone lives with for years. This is rough-in: framing changes, plumbing, electrical, and in a bathroom, the waterproofing that decides whether the room stays dry. Mistakes made here disappear behind drywall and tile, which is exactly why they get checked the hardest.
Demolition itself is done with care for the parts of your home that are staying. Dust control, protected floors and pathways, and a tidy site are not cosmetic niceties; a sloppy demo phase is usually a preview of sloppy finish work. As walls open up, we also look for the surprises older Calgary homes like to hide, such as previous water damage, undersized supply lines, or framing that was never quite right, and we flag them with you before they get covered up.
The rough-in checkpoint is one of the most important in the whole process. Before any wall closes, plumbing connections, electrical layout, blocking for future fixtures, and bathroom waterproofing all get reviewed against the plan. Closing a wall is a one-way door. We make sure what is behind it is right while it is still easy to fix.
- Protected pathways, dust control and a tidy site through demolition
- Hidden problems flagged with you before they get covered
- Plumbing, electrical and blocking checked against the approved plan
- Bathroom waterproofing reviewed before any tile goes on
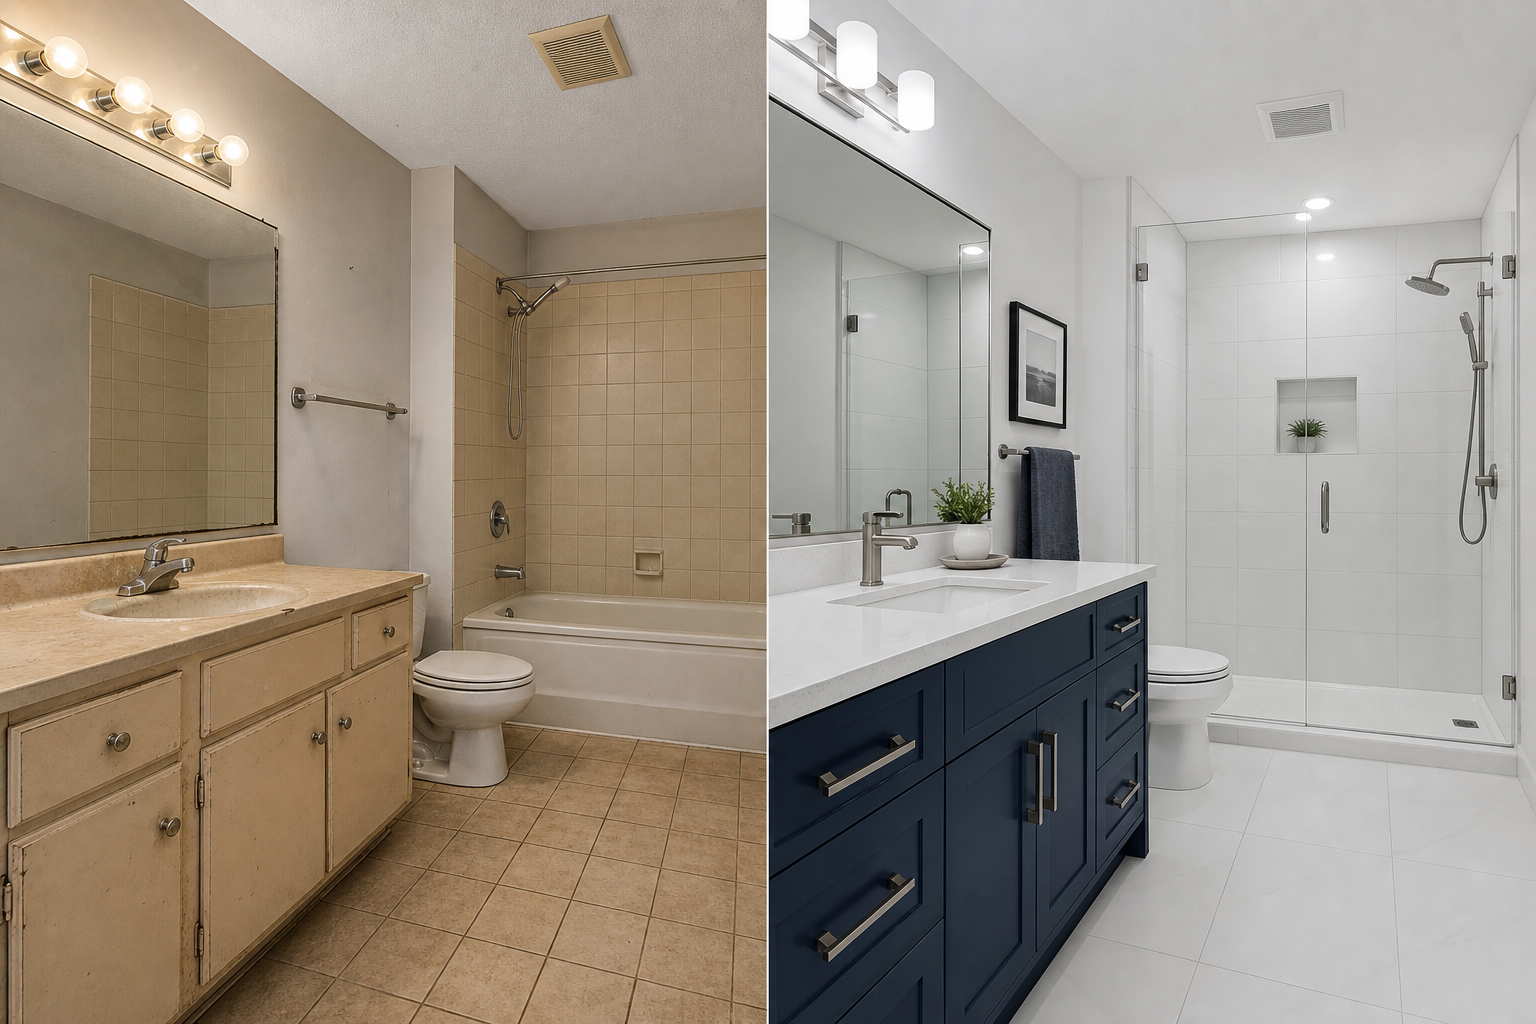
Finishing: where workmanship is either obvious or invisible
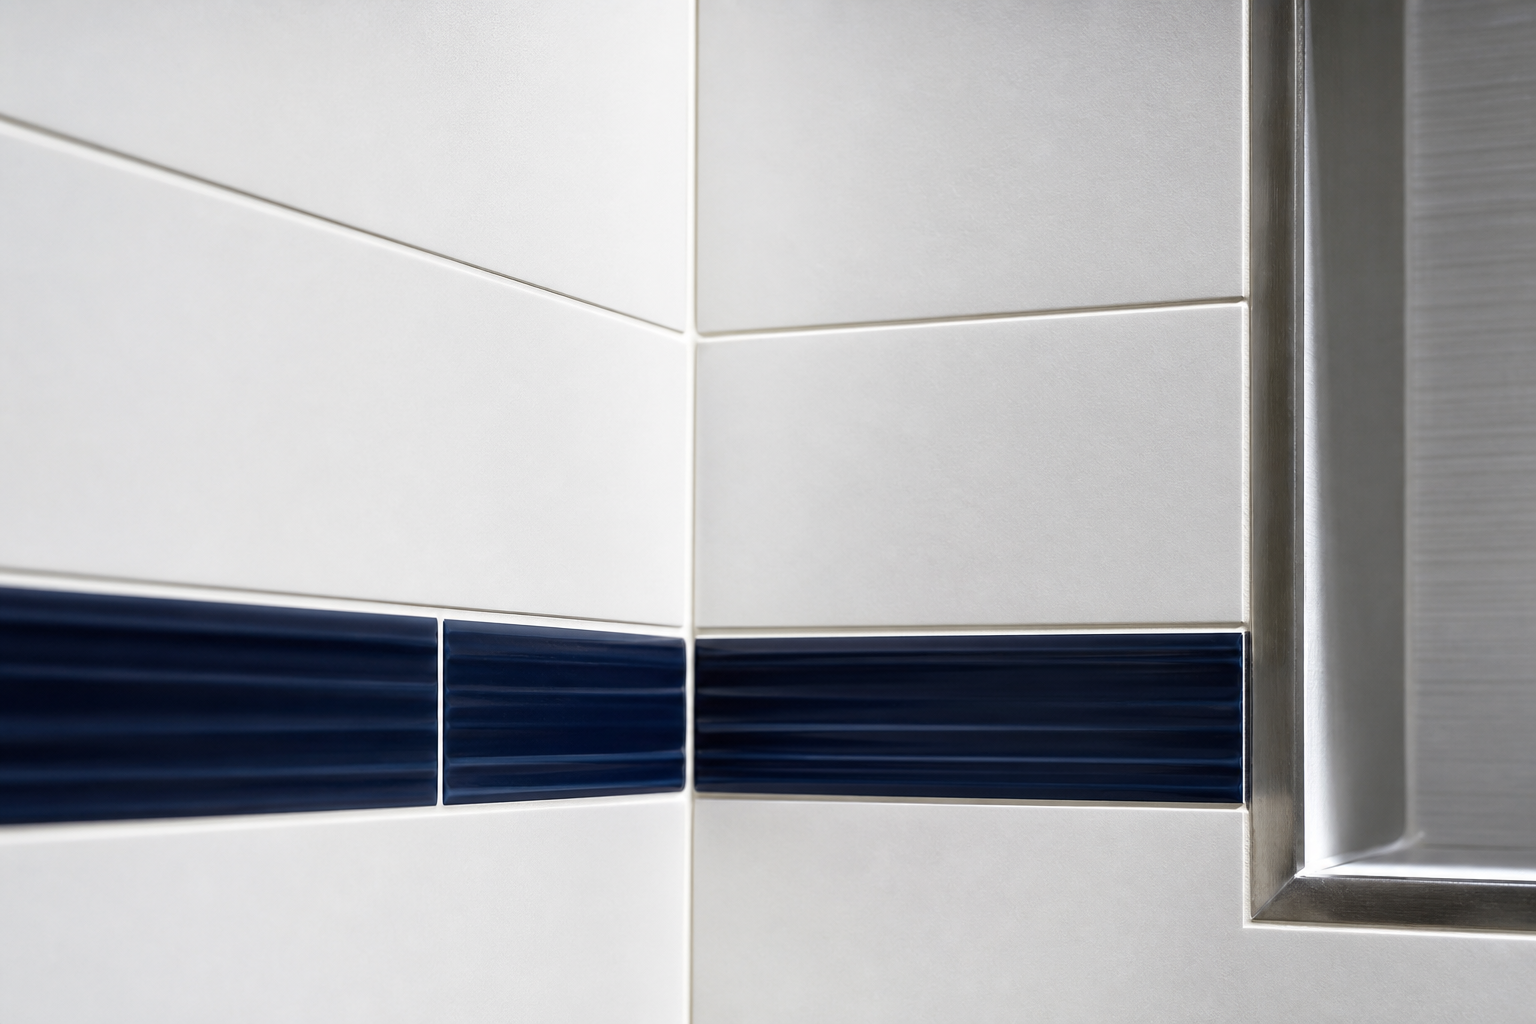
Finishing is the stage homeowners feel every day, and it is where the difference between contractors becomes impossible to hide. Tile, cabinetry, countertops, fixtures, paint, and trim are all about consistency: lines that stay true, transitions that meet cleanly, reveals that are even, and surfaces that line up where two materials meet. None of it is dramatic on its own. All of it is what your eye notices when you walk into the room.
We treat finish work as the headline of the job, not the leftover. Tile is set so grout lines stay consistent and cuts land where they belong, not in awkward slivers at the most visible edge. Cabinet doors and drawers are adjusted so they sit flush and run smooth. Countertop seams are placed thoughtfully and finished cleanly. Where wood meets tile, or tile meets paint, the transition is planned rather than improvised. Fixtures are set straight and snug, because a faucet that sits a few degrees off is the kind of thing you stop seeing after a week and your guests never do.
Throughout finishing, the work is checked as it goes, not in one rushed sweep at the end. Catching an off tile while the thinset is still workable is a five-minute fix. Catching it after grout is a demolition. Built-in checks during finishing are how the punch list at the end stays short.
- Consistent grout lines and deliberate tile cuts at visible edges
- Cabinet doors and drawers adjusted to sit flush and run smooth
- Clean material transitions where wood, tile and paint meet
- Fixtures set straight, level and properly sealed
What gets checked, and when
Quality control only works if it happens at the right moments, while the work is still easy to correct. Spreading checks across the renovation, instead of saving them for a single final inspection, is the whole point. Here is how the checkpoints line up with the stages of a kitchen or bathroom renovation.
- Pre-start checkpoint. Scope, selections, and sequence confirmed in writing. Everyone is building from the same plan before demolition begins.
- Post-demolition checkpoint. Once the space is opened up, we review actual conditions against the plan and flag any hidden surprises with you before work continues.
- Rough-in checkpoint. Plumbing, electrical, blocking and bathroom waterproofing all reviewed before any wall is closed. The most important catch-it-now stage.
- Pre-finish checkpoint. Surfaces, substrates and layout lines confirmed before tile, cabinetry and countertops go in, so finish work starts on a sound base.
- Finish checkpoint. Finishing is checked as it progresses, so off-line work is corrected while it is still a quick fix rather than a tear-out.
- Final punch list. A walkthrough with you, a documented list of anything left to address, and the work isn’t considered done until that list is closed.
The final walkthrough: how a renovation actually gets called done
Plenty of renovations technically end with a handshake and a few lingering loose ends that somehow become your problem. We treat the end of the job as its own stage, with its own checkpoint. The final walkthrough is where you and the team go through the finished kitchen or bathroom together, in good light, looking at it the way you will live in it.
Anything that needs attention goes onto a written punch list: a touch-up here, an adjustment there, a fixture that needs a final tweak. The point of writing it down is accountability. A verbal “we’ll get to that” is easy to forget. A documented list is not. The renovation isn’t finished when the last tile is set; it is finished when that list is closed and the room is genuinely ready to use.
This is also where we walk you through how to care for your new finishes, what to expect as materials settle, and who to call if something comes up. A professional handoff means you are not left guessing about your own renovation the day after the crew leaves.
- A walkthrough done with you, not handed to you on paper
- Outstanding items documented on a written punch list
- The job is closed when the list is closed, not before
- A clear handoff on caring for your new finishes
Why this process is built specifically for kitchens and bathrooms
Kitchens and bathrooms are the two hardest rooms in a house to renovate well, which is exactly why we focus on them. They pack more trades, more decisions, and more unforgiving detail into a small footprint than any other room. A living room can absorb a little imprecision. A bathroom cannot: water, tile, and tight finishes mean small errors become real problems, sometimes hidden ones.
In a kitchen, the process protects the things you use constantly. Cabinet alignment, drawer function, countertop fit, backsplash consistency, and a layout that works the way you actually cook. Get the sequence right and the room feels effortless. Get it wrong and you notice every day. In a bathroom, the process protects the things you can’t see: waterproofing under the tile, proper slope to the drain, and fixtures set so they stay solid and sealed for years. The finish is what sells the room; the rough-in is what saves it.
Because we work in these two rooms specifically, the checkpoints above are not generic project-management theory. They are mapped to the real failure points of kitchen and bathroom renovations in Calgary homes, including the quirks of older houses across the city. That focus is the whole reason the process exists.
- Built around the real failure points of kitchens and bathrooms
- Bathroom checkpoints centred on waterproofing and tile precision
- Kitchen checkpoints centred on layout, alignment and finish fit
- Tuned to the surprises common in older Calgary homes
Good to know.
What does your renovation process actually include?+
It runs in clear stages: a scope review and planning phase, demolition and rough-in, finishing, and a final punch list. Each stage has a quality checkpoint that has to pass before the next stage starts. The idea is to catch problems while they are still easy and cheap to fix, rather than discovering them at the end.
How is quality control different from a final inspection?+
A final inspection only looks at the work once everything is done, when most mistakes are already buried behind tile or drywall. We check work at multiple points throughout the renovation, including a critical rough-in checkpoint before any wall closes. Built-in checks are why the final punch list stays short.
What is a punch list and why does it matter?+
A punch list is a written record of everything that still needs attention at the end of the job, created during a walkthrough you do with the team. It matters because it replaces vague verbal promises with a documented list. We don’t consider the renovation finished until that list is closed.
When in the process should I make my material and finish selections?+
Selections are worked out during the planning stage, before demolition, so material lead times don’t stall the job and so finishes are coordinated with each other from the start. Confirming choices early is one of the simplest ways to keep a renovation on track.
What happens if you find a hidden problem after demolition?+
Older Calgary homes often hide surprises like previous water damage, undersized plumbing, or framing issues. When we find something behind a wall, we flag it with you before it gets covered up, explain the options, and confirm any change in scope by written quote so there are no surprises on the final bill.
Why is the rough-in checkpoint so important?+
Rough-in covers plumbing, electrical, blocking, and bathroom waterproofing, all of which disappear behind drywall and tile. Closing a wall is a one-way door. We review everything against the approved plan before anything gets covered, because fixing it later means tearing finished work back out.
Do you do both kitchens and bathrooms?+
Yes. We focus specifically on kitchen and bathroom renovations because they are the most detail-intensive rooms in a home. The whole checkpoint process is built around the real failure points of these two rooms rather than generic renovation steps.
How do you keep my home clean and protected during the work?+
Demolition and the work that follows are done with dust control, protected floors and pathways, and a tidy site. A messy demo phase is usually a preview of messy finish work, so site care is part of how we work, not an afterthought.
How do I get started and get a quote?+
Send a few photos of your kitchen or bathroom and a note on what you are hoping to do. Call or text 368-337-6627, or email info@prokitchenandbathrenovationscalgary.com. We start with a scope review to understand the project, then confirm the work and pricing by written quote.
Will I know what’s happening at each stage?+
Yes. Scope and selections are documented in writing up front, decisions and any hidden-condition findings are shared with you as they come up, and the job ends with a walkthrough and a written punch list. The goal is a renovation you can follow, not one you have to take on faith.
See what a process-led renovation looks like for your space
Start with a scope review. Send a few photos and a note on your kitchen or bathroom, and we’ll walk you through how the renovation would run, stage by stage. Final pricing is confirmed by written quote.